Installing Email Signature
How to Install HTML Email Signature for Google GMail
GMail users are in luck as the installation process is very straight forward and simple. Assuming that you have a HTML email signature created and coded already, follow the 4 easy steps below to get your super awesome email signature installed.

Step 1: Open your HTML file
Drag your HTML email signature file into a Chrome browser. For this example, we use Safari but we recommend you use Chrome for signatures that contain images.

Step 2: Copy Signature Select your entire signature design (Command+A) and Copy (Command+C). On other broswers where you cannot select the content by highlighting it, go to Edit > Select All and then Edit > Copy
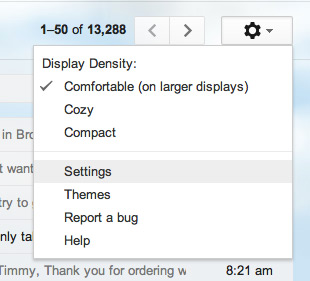
Step 3: Open GMail Settings In Gmail, you may see a Machine Bearing icon on the upper right hand side. In the drop down menu, go to Settings.
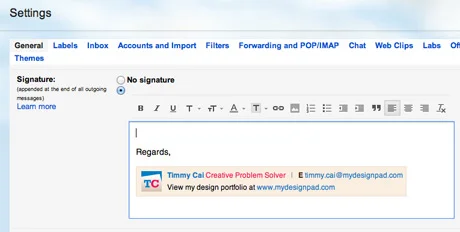
Step 4: Paste HTML Content and SaveUnder the General tab in Settings, scroll down till you find the Signature section. Click inside the Signature edit box and go to Edit > Paste to paste in the HTML you have stored in the clipboard (Command+V). Click “Save Changes” right below the Signature edit box.
That is it! You are done! If you run into any problems installing your HTML email signature into your GMail account, let our team know by send us an email or contacting your project rep directly. We will try my best to help or maybe a fellow reader may. I hope this tutorial is helpful to you and it would be a great pleasure to see your creation so please showcase that wonderful signature you have created!